If you are preparing for the NMC OSCE removal of catheter station using continuous traction method, it helps to know exactly what the assessor expects. Although many candidates see this as one of the easier skills stations, marks are often lost through missed safety points, weak communication, or forgetting the final health education. In the OSCE, simple stations still require structured, confident performance.
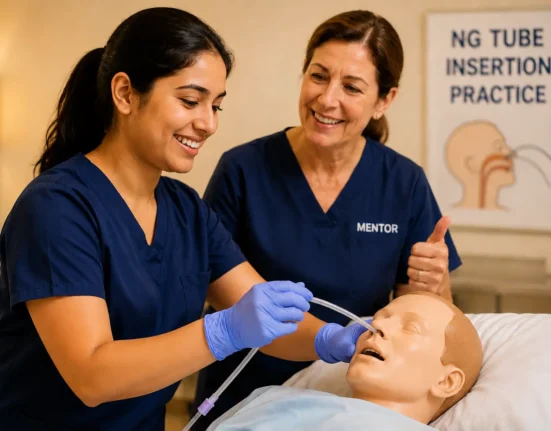
This guide explains the catheter removal station step by step, based on Mentor Merlin training material and aligned with safe clinical practice principles. You will learn how to introduce the procedure, gather equipment, deflate the balloon correctly, remove the catheter using the continuous traction method, assess the catheter tip, clean the area, and give the right patient advice. If you want to build confidence before exam day, the Mentor Merlin OSCE preparation programmes can help you practise each step clearly and calmly.
What happens in the NMC OSCE catheter removal station?
The catheter removal station is usually an 8-minute clinical skill. You are expected to demonstrate safe and professional removal of a urinary catheter after reading the scenario and listening carefully to the assessor’s instructions. Even though the station is short, it tests several areas at once: infection prevention, communication, consent, aseptic awareness, patient comfort, technical skill, documentation, and health education.
In many OSCE settings, privacy and scene safety may not be marked as mandatory in the same way as other stations, but you should still behave professionally throughout. What matters most is that you follow a clear sequence. Start with hand hygiene; greet and identify the patient appropriately, explain the purpose of the procedure, gain consent, mention possible symptoms after removal and provide reassurance with comfort, concerns, and call bell support.
Candidates often lose marks because they rush to the technical part too early. The assessor wants to see that you can care for the patient, not just remove the catheter. So your verbal communication is just as important as the physical procedure.
Essential equipment for urinary catheter removal
Before returning to the patient, collect and check all required equipment. In the exam, assessors often prepare the station well, but you should still know exactly what you need. A confident candidate does not guess.
- Clean tray
- Appropriate syringe, commonly 10 mL
- Gallipot
- Normal saline sachet
- Alcohol swab
- Gauze pieces
- Clinical waste bag or access to a clinical waste bin
- Apron and gloves
As always, validate equipment before use. Check that packaging is intact, items are clean and dry, and expiry dates are valid where relevant. In the OSCE, verbalising these checks shows safe practice. It is also wise to match the syringe size to the volume used to inflate the catheter balloon, although many scenarios commonly state 10 mL.
Step by step: NMC OSCE removal of catheter using continuous traction method
1. Start with hand hygiene and patient introduction
Begin with hand hygiene according to WHO guidance. In the exam, candidates often fully verbalise the seven steps at the start, then use quick hand hygiene for later moments unless they choose to repeat the full process. After that, greet the patient according to the scenario time, introduce yourself, and explain why you are there.
Your explanation should include the doctor’s instructions and the symptoms the patient may feel after catheter removal. This point is important. You should tell the patient that after removal, they may experience urgency, frequency, or discomfort due to irritation of the urethra. Then, gain consent and check comfort.
A good introduction includes:
- Hand hygiene
- Greeting based on time of day
- Introduction by name and role
- Purpose of visit
- Consent
- Explanation of post-catheter symptoms
- Comfort, concerns, and call buzzer
2. Return with equipment and assess the catheter site
After collecting equipment, perform hand hygiene again, put on an apron and gloves, and return to the patient. Ask for permission to proceed and to expose the area minimally. Verbalise your assessment. In the OSCE, you may say that the site is clean and that the catheter bag is empty. This is an important observation and should not be skipped.
If a drape sheet is available, use it according to local setup. If not, continue with minimal exposure and maintain dignity throughout. Clear verbalisation helps the assessor understand what you are doing, especially if the mannequin setup is limited.
3. Deflate the balloon correctly
Next, open the syringe and attach it to the balloon inflation port of the catheter. This is often the coloured port. Aspirate the full amount of sterile water used to deflate the balloon. If the scenario states 10 mL, you should aspirate 10 mL. Discard the syringe into the clinical waste bag if available, or place it safely on the tray until disposal.
This step is essential because removing the catheter before full deflation can cause trauma and pain. In OSCE marking, deflating the balloon properly is a red-flag safety point. Stay calm and verbalise what you are doing so the assessor can clearly follow your practice.

4. Remove the catheter using the continuous traction method
Now instruct the patient to breathe in and out. As the patient exhales, remove the catheter gently and smoothly using the continuous traction method. This wording matters. In the exam, it is not enough to simply pull out the catheter; you should verbalise that you are removing it during exhalation and using a continuous traction method.
This technique supports patient comfort and demonstrates controlled removal. Avoid sudden or forceful movement. The action should look steady, intentional, and gentle. For OSCE success, combine your technique with calm communication, for example: “Please breathe in and out. As you breathe out, I am removing the catheter using a continuous traction method.”
5. Assess the catheter tip after removal
Once the catheter is removed, inspect the catheter tip. Verbalise what you observe. You may say that there is no kinking, no visible discharge, and no obvious sign of infection. Then discard the catheter into the clinical waste stream according to hospital policy.
This is another commonly missed mark. Candidates sometimes focus only on removal and forget the assessment afterwards. However, checking the catheter tip shows that you understand what to look for after the procedure and that you are thinking clinically, not mechanically.
6. Clean the genital area properly
After disposal, prepare the normal saline. Clean the sachet with an alcohol swab, open it, and pour the saline into the gallipot. Using gauze dipped in saline, clean the genital area from front to back. Clean one side first, then the other, and dry the area using fresh gauze. This front-to-back method is important because it reduces the risk of contamination.
Once cleaning is complete, cover the patient promptly to maintain dignity and comfort. If you used a drape sheet, remove it before re-covering the patient.
Instructions after catheter removal
Dispose of used items according to hospital policy, remove gloves and apron, and perform hand hygiene.
One instruction is especially important in this station: the patient must inform the nurse when they pass their first urine after catheter removal. This is a key point and should always be stated. It shows understanding of post-removal monitoring and helps the healthcare team assess urinary function.

Health education after catheter removal
The health education after catheter removal section is often where candidates can secure valuable marks. Keep it simple, practical, and relevant to the patient. You should advise the patient to:
- Drink plenty of water, usually around 2 to 2.5 litres a day unless contraindicated
- Do pelvic floor exercises if appropriate
- Maintain good personal hygiene
- Report their first urine after removal
- Tell staff if they experience pain, urgency, frequency, or difficulty passing urine
This patient education supports recovery and shows the assessor that you can link a procedure with ongoing care. In the real clinical setting, these points also help reduce anxiety and encourage the patient to seek help early if problems develop.
Common mistakes in the NMC OSCE catheter removal station
Because this station seems straightforward, some candidates become overconfident. The most common mistakes include forgetting to mention post-catheter symptoms, failing to check that the catheter bag is empty, not stating the balloon deflation volume, removing the catheter without instructing the patient to breathe out, forgetting to assess the catheter tip, or missing the final instruction about the first urine passed.
Another common issue is poor sequencing. For example, a candidate may clean the area before assessing the catheter tip, or forget to re-cover the patient promptly. Some also forget to verbalise waste disposal, documentation, or final patient comfort checks. In OSCEs, spoken clinical reasoning is often what makes the difference.
How to practise this station effectively
To do well in the NMC OSCE catheter removal station, repetition matters. Practise the procedure aloud, not silently. The exam tests communication and structure as much as physical skill. Time yourself within 8 minutes and rehearse your introduction, balloon deflation wording, continuous traction phrase, catheter tip assessment, cleaning steps, documentation statement, and health education.
If you forget an item while collecting equipment in practice, rehearse how to recover safely. Cover the patient, apologise, remove gloves, perform hand hygiene, collect the missing item, and continue. Learning recovery behaviour can help you stay composed in the real exam.
Mentor Merlin’s NMC OSCE preparation programmes support international nurses with practical station guidance, repeated demonstrations, and exam-focused coaching. If you want help with clinical skills, marking expectations, and communication phrases, structured OSCE practice can make a big difference.
Why this station matters for international nurses
For international nurses working toward UK registration, the OSCE is not only about technical ability. It also assesses whether you can provide patient-centred care in line with UK professional standards. The catheter removal station is a good example of this. It combines safety, dignity, infection prevention, patient education, and documentation in one short scenario.
Understanding this broader expectation can improve your overall performance. If you approach the station as a complete episode of care rather than a single task, you are more likely to meet the assessor’s expectations and feel more confident on the day.

Conclusion
The NMC OSCE removal of a catheter using the continuous traction method station may be short, but it requires organised, safe, and compassionate care. To perform well, remember the full sequence: explain the procedure, mention post-catheter symptoms, collect and check equipment, confirm the catheter bag is empty, deflate the balloon fully, remove the catheter during exhalation using continuous traction, assess the catheter tip, clean the area, document properly, and give clear health education.
If you want guided support for this and other clinical skills stations, Mentor Merlin offers focused preparation for international nurses through NMC OSCE, CBT, and OET programmes. Explore the training options at mentormerlin.com and build your confidence before exam day.
FAQ: NMC OSCE removal of catheter using continuous traction method
What is the continuous traction method in catheter removal?
The continuous traction method means removing the catheter gently and steadily in one smooth movement, usually as the patient exhales. In the NMC OSCE, you should clearly verbalise this technique during the station.
Do I need to mention post-catheter symptoms in the OSCE?
Yes. You should tell the patient they may experience urgency, frequency, or discomfort after catheter removal due to urethral irritation. This shows patient education and helps you gain marks for communication and aftercare.
What should I assess after removing the catheter?
After removal, inspect the catheter tip and verbalise findings such as no kinking, no discharge, and no obvious signs of infection. This is an important safety and assessment point in the station.
What health education should I give after urinary catheter removal?
Advise the patient to drink plenty of water, maintain personal hygiene, do pelvic floor exercises if appropriate, and inform staff when they pass their first urine. Also tell them to report discomfort or difficulty passing urine.
How can I improve my score in the NMC OSCE catheter removal station?
Practise the full sequence aloud, including communication, consent, equipment collection, balloon deflation, continuous traction wording, assessment, cleaning, documentation, and health education. Timed rehearsal and feedback are very helpful.
Read our detailed blog – “NMC OSCE Suppository Insertion: 8-Step Complete Walkthrough ” – to ensure your journey stays on track.
Why Wait? Just Merlin It!
Free Consultation – Chat now with a Mentor.